I've set up a mirror site here:
http://samvskitchen.blogspot.com/
(This way the blog name and the domain name match). This site isn't going to be deleted, but I will use the other address for further updates. Please update your bookmarks accordingly, and sorry for any confusion. I figured it was best to address it earlier rather than later!
Sam
Monday, April 19, 2010
Friday, April 16, 2010
Maple Cinnamon Oatmeal Cookies

I was recently commissioned by a friend to make cookies for a meeting to which he was supposed to bring refreshments. The only difficulty was that it was a morning meeting, and he wanted more breakfast-themed cookies. We chatted about it and came up with a few ideas, which I will be posting individually.
The first, most obvious, idea was oatmeal cookies... oatmeal is a breakfast food, and therefore so are oatmeal cookies. This is my logic, and it has served me well all my life. I threw in maple syrup for good measure. The caveat is that these are not super maple-y. If you want a stronger maple flavor you could probably throw in 1/2 tsp maple extract. I didn't simply because I don't have it on hand.
Please do use real maple syrup. I'm not generally fanatical about foods, but there are a few things I absolutely detest: hydrogenated margarine, artificial vanilla and fake maple syrup. This unholy triumvirate may well lead to the decline and fall of Western civilization, if you ask me.
Maple Cinnamon Oatmeal Cookies
Beat together until totally mixed:
1/2 C (1 stick) butter
1/2 C brown sugar
Add in and beat until mixed:
1 egg/egg replacer*
2 tbsp maple syrup (preferably grade B for more maple flavor)
In separate bowl combine:
1 C flour
1/4 tsp salt
1/2 tsp baking soda
Add flour mixture to butter/sugar mixture, stir until mixed.
Add:
1/2 C oats
1/2 C cinnamon chips (sold by Hershey's)
1/4 C raisins (optional)
Stir until blended.

Roll dough into 1-2" balls. Because of the raisins and chips the balls might not be perfectly circular, that's fine.

Squish the balls a little with a fork or your fingers so that they are flat on top, then bake at 350F for ten minutes.

Nom cookies. Not to be arrogant or anything, but I honestly believe this is one of the finest recipes I've ever developed. They really are good.
*Note: I used egg replacer powder and omitted the water. If you're using a real egg you may have to add just a couple of tablespoons of flour to make up for the extra liquid. Only do this if the dough seems really sticky.

Lemon bars

I am a huge fan of lemon bars, so much so that I can only make them if I have an opportunity to give them away. Otherwise I am entirely capable of eating an entire pan by myself. So when a friend came to visit last week I was pretty excited when she said that she liked lemon bars.
I always use this recipe, with (of course) modifications. Because, seriously? Two full cups of sugar in the lemon layer? I don't think so.
Recipe:
Preheat oven to 325F
Line a 9x13" pan in aluminum foil, then spray foil with pam (you can skip the foil if you really want to, but it makes removing the cookies later a heck of a lot easier).
In a blender, food processor or with a pastry cutter, blend:
1 C (two sticks) butter
2 C white flour
1/2 C confectioner's sugar (aka 10x sugar or powdered sugar. Normal sugar really won't work.)
This works best if the butter is cold; taking it straight out of the fridge works best. While I have used my stand mixer for this step, the texture is better if the dough isn't really blended together. You're looking for something that appears to be crumbs, rather than a smooth dough:

Dump the dough into the pan, spread it out as evenly as possible, and press down firmly. You want it to be about even thickness across the pan, but since it's going to be covered up by lemony goodness it doesn't have to be beautiful:

Stick this in the oven for 18-20 minutes, or until it is just *barely* beginning to turn a little bit brown at the edges.
While the crust is baking, blend the following until completely mixed:
1 1/2 C sugar
1/4 C flour
4 eggs (not egg replacer)
1/3 C lemon juice (about what you get from one large lemon. I sometimes add in a little extra since I have lemon juice in my fridge at all times
~1 tbsp lemon zest (about what you get from one large lemon).
Notes:
1. If you mix the sugar and flour together before adding anything else you're less likely to get clumps of flour in the batter.
2. I use a microplane zester to zest the lemon. Basically you grate off all of the yellow part of the lemon skin, leaving the white part underneath untouched. The best way to deal with the lemon is to do this first, then cut the lemon in two and squeeze the juice out.
Once this is completely blended, pour it over the prepared crust. It's ok if the crust hasn't totally cooled.

Bake for 20 more minutes, or until the lemon mixture is set. Again, you should only see the faintest of browning on the top of the bars when you take it out. If you leave it in too long the bars are kind of dry and have a funny texture. Here's how it should look when you pull it out of the oven:

Add lots of powdered sugar with a sifter (I've also used a tea ball for this. Open the tea ball, spoon in some powdered sugar, close the tea ball, then shake it over the cookies. This works really well, actually).
Finished cookies:

Wait until the bars are completely cooled before cutting, or you will make a mess. As a side note for those allergic to milk: I have personally made these using Earth Balance sticks instead of butter and it works just fine.
COMMON ABBREVIATIONS
I generally use imperial (volumetric) measurements because most cookbooks in the States still use this system for reasons I cannot fathom. For those unfamiliar with these measurements (which I firmly believe were invented by chipmunks on crack), here are a few useful conversions and abbreviations:
C: Cup
tsp: teaspoon
tbsp: tablespoon
g: gram
oz: ounce
Good to know:
1. There are 3 teaspoons in 1 tablespoon
2. There are 16 tablespoons in 1 Cup
3. There are 8 fluid ounces in 1 Cup
4. There are 2 Cups in 1 pint
5. There are 4 Cups in 1 quart (which is roughly equal to 1 liter)
C: Cup
tsp: teaspoon
tbsp: tablespoon
g: gram
oz: ounce
Good to know:
1. There are 3 teaspoons in 1 tablespoon
2. There are 16 tablespoons in 1 Cup
3. There are 8 fluid ounces in 1 Cup
4. There are 2 Cups in 1 pint
5. There are 4 Cups in 1 quart (which is roughly equal to 1 liter)
Wednesday, April 14, 2010
Mom's Neutron Torte
This is my mother's (in)famous chocolate torte recipe (also known as "neutron torte" or "instant heart attack inducer torte"). She has kindly given me permission to post this recipe. For those people in my department, this is what I brought to the MMG department party two months ago.
I've adjusted mom's recipe to make only one torte. She always makes two and freezes one if she doesn't need the second one immediately; I simply don't have the freezer space to do so. I've also added hazelnut to the glaze, which I quite like.
Recipe:
Snap out the bottoms of an 8" springform pan (flat bottomed preferred). Cover bottom of pan with foil, snap it back in, butter the sides and the foil-covered bottom (or spray with pam, that's what I do).

CAKE:
Separate 3 eggs (save both whites and yolks).
Mix together:
2 melted sticks butter
1.5 C sugar
1 tsp bourbon vanilla
1/8 tsp salt
Add in and beat together until totally blended:
1/4 C cream
3 egg yolks.
Mix together in a separate bowl:
1 C flour
2/3 C cocoa powder (NOT hot chocolate mix). Either dutch processed or normal cocoa will work, they'll just give slightly different flavors. I use whatever I have on hand.

Add to butter mixture and mix until till smooth.
Beat separately:
3 egg whites
1/8 tsp. cream of tartar. Underbeating is better than overbeating.

Side note: do you have any idea how hard it is to photograph white whipped egg whites in a white bowl sitting on a white stove? Yeesh.
Fold egg whites into chocolate mixture:

You really don't want to over-mix, or you'll lose all that air that you so carefully beat into the egg whites. Here's what it should look like shortly before you put it in the pan:

And here's what it looks like before baking:

Put in the pan and bake at 350 for 45 minutes. Center will not be solid, and cracking should appear. Run a knife carefully around outer edges; cake will fall.
Cool at least an hour. Loosen springform sides and remove. Put a plate on bottom of cake and flip over. Peel off bottoms of pans, then the foil. Glaze when fully cooled.
GLAZE:
Chop:
1/2 lb (250 g) bittersweet chocolate (we use Trader Joe's pound plus bars)
Add:
2/3 to 3/4 C cream
1 tsp hazelnut extract (this is what I do, mom has done mint before, which is also very good. My next plan is to try raspberry extract).
Melt chocolate in cream using a double boiler or microwave (I use a microwave). Try not to incorporate extra air in as you stir or you'll get bubbles, which are annoying. Also, it is important that every edge of every piece of chocolate be dunked in the cream before heating or that piece of chocolate may seize into a hardened, unmeltable lump.
When glazing, mom makes a backwards J from the center, turns the cake slightly, and repeats all the way around. If you use the smaller amount of cream the indentations will be clearer. When I make these I then stick the glazed torte in the fridge until the glaze sets. Once it has set you can run a knife around the bottom, insert a spatula under the torte and lift the whole thing to a new (clean) plate, which is prettier than leaving it on the plate you used while glazing the torte.
Note: my mom uses manufactoring cream for this recipe, which has a higher saturated fat content, so it holds shape better. I just use regular heavy cream, and I think it works just fine.
I've adjusted mom's recipe to make only one torte. She always makes two and freezes one if she doesn't need the second one immediately; I simply don't have the freezer space to do so. I've also added hazelnut to the glaze, which I quite like.
Recipe:
Snap out the bottoms of an 8" springform pan (flat bottomed preferred). Cover bottom of pan with foil, snap it back in, butter the sides and the foil-covered bottom (or spray with pam, that's what I do).

CAKE:
Separate 3 eggs (save both whites and yolks).
Mix together:
2 melted sticks butter
1.5 C sugar
1 tsp bourbon vanilla
1/8 tsp salt
Add in and beat together until totally blended:
1/4 C cream
3 egg yolks.
Mix together in a separate bowl:
1 C flour
2/3 C cocoa powder (NOT hot chocolate mix). Either dutch processed or normal cocoa will work, they'll just give slightly different flavors. I use whatever I have on hand.

Add to butter mixture and mix until till smooth.
Beat separately:
3 egg whites
1/8 tsp. cream of tartar. Underbeating is better than overbeating.

Side note: do you have any idea how hard it is to photograph white whipped egg whites in a white bowl sitting on a white stove? Yeesh.
Fold egg whites into chocolate mixture:

You really don't want to over-mix, or you'll lose all that air that you so carefully beat into the egg whites. Here's what it should look like shortly before you put it in the pan:

And here's what it looks like before baking:

Put in the pan and bake at 350 for 45 minutes. Center will not be solid, and cracking should appear. Run a knife carefully around outer edges; cake will fall.
Cool at least an hour. Loosen springform sides and remove. Put a plate on bottom of cake and flip over. Peel off bottoms of pans, then the foil. Glaze when fully cooled.
GLAZE:
Chop:
1/2 lb (250 g) bittersweet chocolate (we use Trader Joe's pound plus bars)
Add:
2/3 to 3/4 C cream
1 tsp hazelnut extract (this is what I do, mom has done mint before, which is also very good. My next plan is to try raspberry extract).
Melt chocolate in cream using a double boiler or microwave (I use a microwave). Try not to incorporate extra air in as you stir or you'll get bubbles, which are annoying. Also, it is important that every edge of every piece of chocolate be dunked in the cream before heating or that piece of chocolate may seize into a hardened, unmeltable lump.
When glazing, mom makes a backwards J from the center, turns the cake slightly, and repeats all the way around. If you use the smaller amount of cream the indentations will be clearer. When I make these I then stick the glazed torte in the fridge until the glaze sets. Once it has set you can run a knife around the bottom, insert a spatula under the torte and lift the whole thing to a new (clean) plate, which is prettier than leaving it on the plate you used while glazing the torte.
Note: my mom uses manufactoring cream for this recipe, which has a higher saturated fat content, so it holds shape better. I just use regular heavy cream, and I think it works just fine.
Mom-safe chocolate raspberry cookies

I made these for a meeting this week and they went over very well. In fairness, I suspect that anything with chocolate would probably go over well at any meeting that starts at seven on a busy Tuesday evening, but I still think it's a good recipe.
As usual, I'm only getting around to actually updating this blog because someone(s) asked for the recipe. I like to think that I'm not so much "lazy" as "insanely busy." But that may be denial; it's probably a little of column A, a little of column B.
Anyway.
Mom-friendly Chocolate Raspberry Cookies: (The last recipe I designed wasn't something my mom could try because of health constraints, so I made sure this one is. This means it can't have any nuts or seeds, hence the use of raspberry extract rather than preserves, jam, etc.)
Blend together until completely mixed:
1/2 C butter
1/2 C brown sugar (white sugar would work, I just happened to be out of it).

You really want the butter and sugar to be well mixed. I wait for it to look light and almost fluffy.
Add in:
1 egg/1 egg replacer equivalent (I used the replacer).
Mix well, then add:
1 tsp raspberry extract
1/2 tsp vanilla extract (use the real stuff, vanillin fake stuff is vile).
In a separate bowl mix: (candor compels me to admit that I don't bother with the "separate bowl" thing, but that's because I have a stand mixer so everything gets mixed fast. If you're mixing by hand you really should mix dry ingredients separately).
1/2 tsp baking soda
1/4 tsp salt
1/4 Cup cocoa powder (NOT hot chocolate mix)
1 Cup flour
Mix until blended, then add to butter mixture, and mix until flour is just barely incorporated. Then add roughly a cup of chocolate pieces of some variety. Here's what I used:

1. About 1/2 C chopped milk chocolate (Trader Joe's Pound Plus bar, thanks Mom for supplying it since I still live in this forsaken state that has no TJ store!)
2. 1/4 C dark chocolate (an extra half of a 85% dark lindt chocolate bar I had sitting around).
3. 1/4-1/2 dark chocolate truffles, chopped. A kind friend gave me a ton of these when I was sick last year, and I haven't been able to get through all of them, so I threw them in-- definitely a good move.
For those (like one of my siblings) who are allergic to milk, it would totally work with all dark chocolate. The chopped truffles are a nice addition, though, so if you happen to have dairy-free truffles on hand (don't laugh, many people in my family would have random truffles lying around) do chop a few and throw them in.
Mix in the chocolate pieces (this can be done with a stand mixer turned to low or just with a spatula).
At this point I rolled the cookie dough into balls (1-2" in diameter), stuck them on a cookie sheet and froze them. This is the best way to plan ahead for cookies when you know you won't have much time during the week. If you want cookies right away, obviously don't freeze the cookie dough.
Bake at ~350F* for 8-10 minutes (may take a couple minutes longer if dough is frozen). You want these cookies to look just barely undercooked when you take them out of the oven.

Directly after taking out of the oven sift powdered sugar on top of them. The first layer may melt a bit, that's ok. Just keep adding sugar until they look thoroughly dusted.
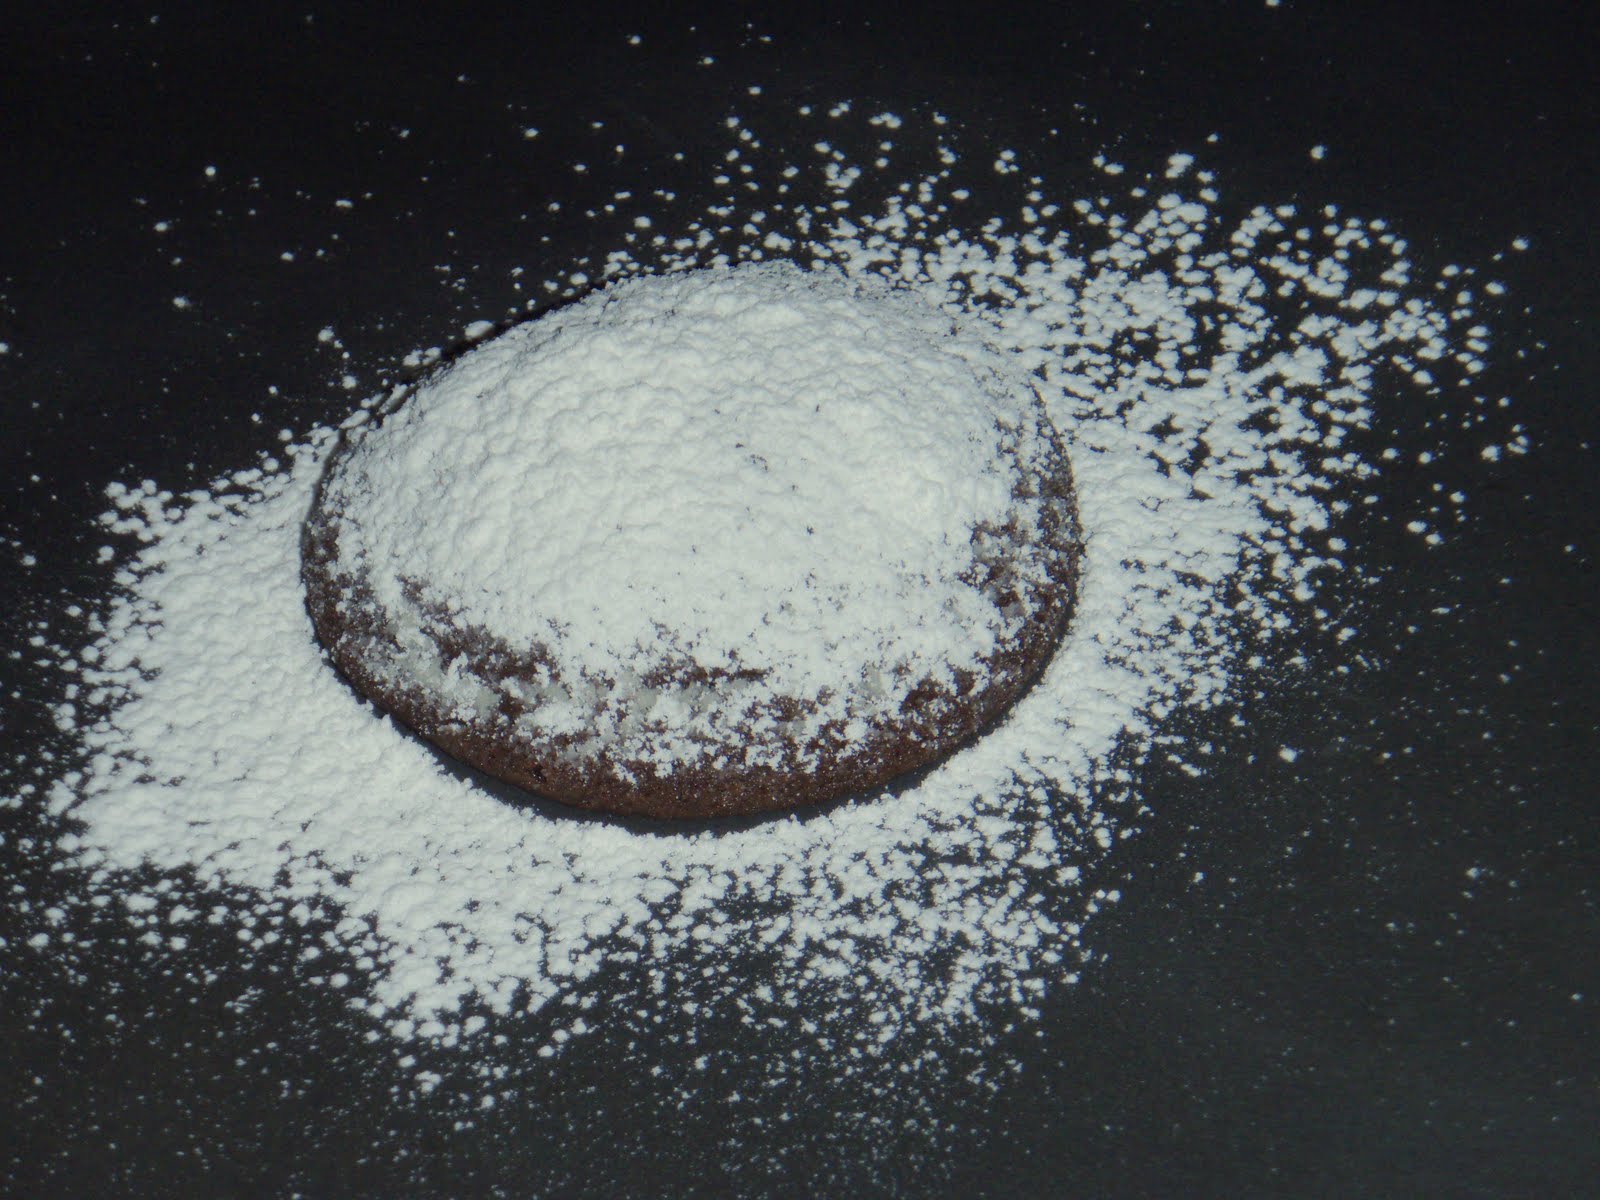
Let cool on the pan for about ten minutes, then loosen with a spatula. Add more powdered sugar if necessary. Note: it's not a great idea to package the cookies into a tupperware container before they are totally cool, or they'll kind of melt together. Nobody will be terribly bothered by this, but it is a bit of a pain.
*sorry about the iffy temperature. I live in a craptacular student apartment whose oven takes a somewhat stochastic approach to temperature regulation, so I have to guess what temperature it really is at any given moment.
Tuesday, March 16, 2010
Deep thoughts on egg replacer...

Because I've had questions on the subject, here are a few scattered thoughts about egg replacer. You may have noticed that I use it in most of my cookies. I know I've mentioned it before, but thought it was worth doing a single entry on the subject.
For a while I experimented with being vegan. It was interesting, from a culinary perspective, to be forced to cook without any animal products. And it turned out to be very valuable, since one of my relatives developed a severe allergy to milk; I've learned many tricks and substitutions that come in very handy.
Since I'm no longer vegan, why do I bother with the egg replacer? There are several reasons reasons:
1. Ener-G egg replacer (the kind I use) is cheaper than eggs. Pretty self-explanatory, really. I'm a grad student, therefore I'm poor.
2. Ener-G can be kept indefinitely in a cupboard. It takes up very little space, and does not go off. So no checking of expiration dates, etc. is ever required.
3. To the best of my knowledge, egg replacer has never been linked to salmonella or any other food-borne pathogen. So I can eat cookie dough (which I generally prefer to cookies) without any worry about food poisoning.
4. To use Ener-G egg replacer, you add 1.5 tsp powdered egg replacer and 2 tbsp water... but I've learned that "water" can be interpreted as "any liquid I like." So by using egg replacer I suddenly have the ability to add different liquids without screwing up the liquid/dry ingredient ratio. This comes in very handy for things like rum cookies, the recipe for which I will post one of these days. I've also, as I've mentioned before, often used flavored coffee creamer in place of the water as a way of changing the flavor of cookies without having to invest in a ton of different extracts. Cheap, convenient, tasty.
5. Health. No eggs in a recipe = lower saturated fat, cholesterol, etc. Plus some people are allergic to eggs, so it's nice to be able to offer them something they can eat.
When do I not use egg replacer?
1. Anytime eggs are a structurally essential part of what I'm cooking (cream puffs/eclairs, for example, to say nothing of angel food cake and the like). I know that the Ener-G people would like us to believe that it will always work as a substitute, but it's simply not true.
2. Brownies. I don't know why, but it never works for me.
3. For most cakes I use at most 50/50 egg replacer/egg. Many cakes need the extra richness provided by eggs, so I don't like to totally swap out the eggs unless I am really sure it's going to work.
4. Any really rich dessert (chocolate torte, cheesecake, etc). Again, the dessert often requires the richness of the eggs to really work.
As a good rule of thumb with a new recipe, try a 50/50 swap, then go from there. If it totally fails, the recipe is probably not amenable to egg replacement. If it works justs fine, you can probably try a total replacement, preferably not when you're pressed for time (so if it fails you won't freak out).
So those are my thoughts... I recommend giving egg replacer a go for those who bake a lot. It's convenient, cheap and easy to use.
Saturday, March 13, 2010
Almond Cookies
Many apologies for the delay in posting, as usual someone requested the recipe a while ago, but I haven't had time to actually write it down. Now that Tae Kwon Do winter camp is over (exhibit A in the "Things I Do to Support My Eating Habit" display), however, I can actually get back to being a semi-normal human being.
Or so I hope.
Anyway, here is the newest and greatest in the Sam Recipe File. For fellow Hydes, I'll comment that the almondness of these cookies always reminds me of the Spritz cookies we make every Christmas, but without the suspicious green food colouring. For everyone else, I'll just say that this is a d*@! fine cookie recipe.
The inspiration:

Now I live in a poor benighted state that does not have a single (I know this is shocking) Trader Joe's store anywhere within the state boundaries. The nearest TJs is about four hours away in Massachusetts. One of the things I really enjoy from TJ is their very tasty chocolate almonds, so when I saw that Costco was selling them I was a pretty happy bunny. Unfortunately, Costco's almonds aren't as good as TJ chocolate almonds, but they are pretty tasty nonetheless, and there were an awful lot of them. I quickly realized I probably could (but definitely should not) eat the whole lot by myself. So I decided to cookify them...you know, for health reasons. (This made sense at the time. Really.)
Step 1:
Pulverize the heck out of the almonds. I used a blender for this. A food processor would also work. The only thing to watch out for is that you don't want to make almond butter here, so short quick pulses are better than turning the blender on and walking out of the room. You want small but not necessarily uniform pieces.

Step 2:
Make the cookie dough.
Blend well:
1/2 Cup (one stick) butter
2/3 Cup sugar (light brown sugar also works, or a mix of the two.)
Once this is completely blended together, add:
1 egg (or 1 egg worth of egg replacer, which is what I use).
Mix until completely blended together. Then add 1.5 teaspoons almond extract (anywhere between 1 and 2 is fine, I've settled on 1.5 as a happy medium, having tried 1, 1.5 and 2).
In separate bowl, combine:
1/2 tsp baking soda
1/4 tsp salt
1 1/3 Cup all-purpose flour
Add flour mixture to butter/sugar mixture, mix until incorporated (but stop mixing once this occurs, you don't want to overmix it). Then add whatever chopped up almonds you haven't snitched. Roll the cookies into balls, stick on a sheet and bake for 10-12 minutes at 350F. You may need to add a tablespoon or two of flour if the cookie dough is sticky. If you're unsure, bake just one or two cookies. If they spread out too much, add a little more flour to the rest of the dough before baking.
Cookie dough before baking:

Cookies after I got all ambitious in a Martha Stewartesque fashion and added a chocolate almond to the top of each cookie before baking them:

As you can see, the cookies should look just barely done when you pull them out of the oven. Leave them to cool on the pan for about five minutes, then loosen with a spatula.
As a side note: it works really well if you roll the cookies out, stick them on a pan and freeze the dough. Once the dough is frozen you can stick it in a tupperware in your freezer and just pull it out whenever you need cookies in a hurry. This will add 2-5 minutes to your baking time, but otherwise nothing changes.
Or so I hope.
Anyway, here is the newest and greatest in the Sam Recipe File. For fellow Hydes, I'll comment that the almondness of these cookies always reminds me of the Spritz cookies we make every Christmas, but without the suspicious green food colouring. For everyone else, I'll just say that this is a d*@! fine cookie recipe.
The inspiration:

Now I live in a poor benighted state that does not have a single (I know this is shocking) Trader Joe's store anywhere within the state boundaries. The nearest TJs is about four hours away in Massachusetts. One of the things I really enjoy from TJ is their very tasty chocolate almonds, so when I saw that Costco was selling them I was a pretty happy bunny. Unfortunately, Costco's almonds aren't as good as TJ chocolate almonds, but they are pretty tasty nonetheless, and there were an awful lot of them. I quickly realized I probably could (but definitely should not) eat the whole lot by myself. So I decided to cookify them...you know, for health reasons. (This made sense at the time. Really.)
Step 1:
Pulverize the heck out of the almonds. I used a blender for this. A food processor would also work. The only thing to watch out for is that you don't want to make almond butter here, so short quick pulses are better than turning the blender on and walking out of the room. You want small but not necessarily uniform pieces.

Step 2:
Make the cookie dough.
Blend well:
1/2 Cup (one stick) butter
2/3 Cup sugar (light brown sugar also works, or a mix of the two.)
Once this is completely blended together, add:
1 egg (or 1 egg worth of egg replacer, which is what I use).
Mix until completely blended together. Then add 1.5 teaspoons almond extract (anywhere between 1 and 2 is fine, I've settled on 1.5 as a happy medium, having tried 1, 1.5 and 2).
In separate bowl, combine:
1/2 tsp baking soda
1/4 tsp salt
1 1/3 Cup all-purpose flour
Add flour mixture to butter/sugar mixture, mix until incorporated (but stop mixing once this occurs, you don't want to overmix it). Then add whatever chopped up almonds you haven't snitched. Roll the cookies into balls, stick on a sheet and bake for 10-12 minutes at 350F. You may need to add a tablespoon or two of flour if the cookie dough is sticky. If you're unsure, bake just one or two cookies. If they spread out too much, add a little more flour to the rest of the dough before baking.
Cookie dough before baking:

Cookies after I got all ambitious in a Martha Stewartesque fashion and added a chocolate almond to the top of each cookie before baking them:

As you can see, the cookies should look just barely done when you pull them out of the oven. Leave them to cool on the pan for about five minutes, then loosen with a spatula.
As a side note: it works really well if you roll the cookies out, stick them on a pan and freeze the dough. Once the dough is frozen you can stick it in a tupperware in your freezer and just pull it out whenever you need cookies in a hurry. This will add 2-5 minutes to your baking time, but otherwise nothing changes.
Saturday, February 6, 2010
Nigella Lawson's White Bread Recipe
Although I'm embarrassed to even own a cookbook by this title, it really is a fantastic baking cookbook. As requested by Ashley, here are basic instructions for a very basic loaf of white bread. I've borrowed heavily from Nigella, but most of the more, er... technical... terms are my own. :)
Total Ingredient list:
~3.5 C white bread flour
1 tbsp/package yeast
1 tbsp salt
~ 1 1/3 C warm water (NOT hot... if it feels hot to your hand it will probably kill the yeast, and then you'll have, essentially, matzah. Which is fine if you like unleavened bread, but probably not what you're going for here).
Put the following in a bowl:
3.5 Cups white bread flour
1 package yeast OR 1 tbsp yeast (rapid rise is nice, but the other is cheaper so I usually use the standard stuff Costco sells).
1 tbsp salt
3/4 C water
Mix until it's a homogenous mess. You may have to add additional water.
Add 1 tbsp melted butter (oil will also work)
Start kneeding... I use a stand mixer, but if you don't have one basically mix in as much flour as you need to keep it from completely sticking to your hands, then start working the dough with your hands. I generally hit the bread dough with the heel of my hand, squoosh it down, then pick up the dough, turn it on its side and do the same thing. This should take roughly ten minutes if you're doing it by hand. My sister swears this is very therapeutic. :) If the bread is sticky wet add a little more flour. If it's so dry that it's not staying together, add water. As you can tell it's not a super exact science. You'll know that you're done kneeding when the dough looks smoother and more elastic-y.
Through the dough into an oiled bowl. Cover top of the bowl and stick it somewhere warm for an hour or two. It should double in size during this first rise. Note: This is also the time when you can stick it in the fridge overnight if you want to actually bake it the next day.
Punch down the dough. (Yes, literally). You want to deflate it, basically. Then form it into a roughly bread-shaped ball, and plop it into a greased 9x5" bread pan (this is just the standard size bread pan. I've had great luck with ceramic ones, but they can be pricey. Glass works ok. The aluminum non-stick ones can be ok, but I've had problems with their burning the bottom of the bread).
Cover loosly and leave until doubled again. Stick it in a preheated 425F oven for approximately 35 minutes. The loaf should be slightly browned all over and have a hollow sound if you knock the bottom gently with your knuckles (if it doesn't sound hollow, stick it on a cookie sheet and throw it back in the oven for a few minutes). Turn out of pan and cool on a cooling rack (if you don't do this the bottom can get pretty soggy).
Total Ingredient list:
~3.5 C white bread flour
1 tbsp/package yeast
1 tbsp salt
~ 1 1/3 C warm water (NOT hot... if it feels hot to your hand it will probably kill the yeast, and then you'll have, essentially, matzah. Which is fine if you like unleavened bread, but probably not what you're going for here).
Put the following in a bowl:
3.5 Cups white bread flour
1 package yeast OR 1 tbsp yeast (rapid rise is nice, but the other is cheaper so I usually use the standard stuff Costco sells).
1 tbsp salt
3/4 C water
Mix until it's a homogenous mess. You may have to add additional water.
Add 1 tbsp melted butter (oil will also work)
Start kneeding... I use a stand mixer, but if you don't have one basically mix in as much flour as you need to keep it from completely sticking to your hands, then start working the dough with your hands. I generally hit the bread dough with the heel of my hand, squoosh it down, then pick up the dough, turn it on its side and do the same thing. This should take roughly ten minutes if you're doing it by hand. My sister swears this is very therapeutic. :) If the bread is sticky wet add a little more flour. If it's so dry that it's not staying together, add water. As you can tell it's not a super exact science. You'll know that you're done kneeding when the dough looks smoother and more elastic-y.
Through the dough into an oiled bowl. Cover top of the bowl and stick it somewhere warm for an hour or two. It should double in size during this first rise. Note: This is also the time when you can stick it in the fridge overnight if you want to actually bake it the next day.
Punch down the dough. (Yes, literally). You want to deflate it, basically. Then form it into a roughly bread-shaped ball, and plop it into a greased 9x5" bread pan (this is just the standard size bread pan. I've had great luck with ceramic ones, but they can be pricey. Glass works ok. The aluminum non-stick ones can be ok, but I've had problems with their burning the bottom of the bread).
Cover loosly and leave until doubled again. Stick it in a preheated 425F oven for approximately 35 minutes. The loaf should be slightly browned all over and have a hollow sound if you knock the bottom gently with your knuckles (if it doesn't sound hollow, stick it on a cookie sheet and throw it back in the oven for a few minutes). Turn out of pan and cool on a cooling rack (if you don't do this the bottom can get pretty soggy).
Monday, January 18, 2010
Minty Brownies

Nom nom nom nom...
I am quickly discovering that the unifying force behind food blogs is laziness... the only time I am not too lazy to update this page is when people ask me for a recipe. It is at that point that I realize it that it is easier for me to post the recipe once than to have to write it out for multiple people... so here goes, with apologies to my sister, who may have asked me for this recipe about a month ago.
As anyone who has ever cooked with me knows, I am constitutionally incapable of following a recipe exactly. That being said, the King Arthur Flour Brownie Recipe is by far the best brownie recipe I've ever found. I've even been known to follow it exactly. The only changes I made this time were as follows:
1. I decreased the sugar from 2.25 to 2 Cups (just because I really prefer less sweet desserts, 2.25 isn't overly sweet)
2. I used Hershey's Super Dark cocoa (although the regular stuff works fine, I've used it in the past, this results in a VERY dark brownie)
3. I decreased the vanilla from 1 tablespoon to two teaspoons because I didn't want it to fight with the mint icing.
Other than that, follow the recipe as the wonderful folks at King Arthur Flour have designed it. Make sure you give yourself enough time for the brownies to cool completely before trying to ice it, or you shall have a crumbly mess.
Icing:
I really don't use a recipe for buttercream frosting, which is essentially what this icing is. But basically it is as follows:
Whip the heck out of the following (I use a stand mixer. You can also use a hand-held electric mixture. I suppose it may be technically possible to do this entirely by hand, but I certainly wouldn't try it):
* 8 tbsp/one stick butter (at room temp) (Earth Balance sticks also work. If you ever try Crisco or some equivalent nastiness I may have to hunt you down and beat you with a stick)
* ~3 cups powdered sugar
*1-2 tsp mint extract. I use ~2 tsp, but unless you really like a lot of mint I would recommend using 1 tsp and then add more later if you want it mintier.
Once this has reached a uniform texture and is really, really blended together, add milk until it reaches desired consistency. I add about a tablespoon at a time and then whip it again until it's all incorporated. It should take ~1/4 cup. If you overshoot you'll have a goopy mess. Not to worry; you can add more powdered sugar and fix it. However, with both the milk and the powdered sugar it's a really good idea to only add a little at a time or you'll keep overshooting and end up with a huge bowl of frosting which you will then feel that you have to use/eat. And then your bathroom scale will scream in agony.
Once you have the right texture, taste it to see if you want to add more mint, do so if necessary, and then frost the cooled brownies. I do this by adding about half of the frosting in a thin layer over the top of the brownies, then letting it sit for a minute. I then take a clean knife/spatula and add a second layer. This helps prevent crumbs from getting mixed in the frosting, which doesn't look nice. I have to admit, though, I have a hard time making it look totally even, so don't worry about it if it's not perfect.
Edit: for a variation my family won't make but other people might enjoy, add 1 tsp instant coffee to brownie batter. Then use Bailey's Irish Cream in place of milk in the frosting (and omit the mint extract). You'll need about 2 tbsp, maybe, then switch to milk. This will add an almost negligable amount of alcohol, but it's really good. Basically you'll have created Irish Coffee Brownies. You may have to fend people off with a baseball bat, if my experience bringing these to a potluck is any indication.
Saturday, November 7, 2009
C is for Cookie, it's good enough for me...
because, really? The Cookie Monster singing about vegetables? Not so much with that.
Alternative Title: "Sam finds another excuse to break her self-imposed moratorium on cookie-baking."
I've been a) very sick and b) attempting to reduce my cookie intake, hence the lack of updates recently. However, my friend is having a party tomorrow and she requested that I make cookies. That is more than enough excuse for me, so here goes...
I tried variation of my usual chocolate chip cookie recipe. I followed the basic recipe with two exceptions:
1) I use Ener-G egg replace, which calls for the addition of two tablespoons of water. I used one tablespoon of water and one of vanilla coffee creamer. Using coffee creamer this way is a great (read: cheap) way to enhance/change the flavor of cookies. Coconut creamer is especially good, for those who love coconut. (I don't, but I've used it when making cookies for those who do, and they've loved it).
2) I decided to try Dorie Greenspan's suggestion of chopping my own chocolate rather than using chips. Using a fantastic Trader Joe's dark chocolate pound plus bar that my family kindly sent when they found out I was sick, I made my own chocolate chunks.

The resulting cookie dough was tasty, and had uneven sized chocolate bits in every cookie.

The cookies themselves also turned out well:

(The trick is to take the cookies out of the oven just before they actually look done. They will finish baking on the pan and be very soft).
The advantage to chopping your own chocolate is that you generally get better quality chocolate in bars than you do in commercial chocolate chips. Of course, it helps if you a) live near a Trader Joe's store, or b) have nice family members who will mail you pound plus bars.
The second variety of cookie is one I came up with as part of an attempt to use up extra Halloween candy. My friend and I each bought a huge bag of mixed chocolates from Costco, you know... for kids. I had, however, a grand total of one trick-or-treater. In an attempt to not eat the whole bag myself, I decided to experiment with adding chopped candy to my cookies. The base cookie recipe is exactly the same as the standard one except that I used one cup of flour and 1/4 c cocoa powder instead of 1 1/4 C flour. I then added M&M's, peanut butter chips, and chopped up Mars Bars, Snickers Bars, Nestle Crunch Bars, and Snickers Fudge bars. I basically added candy "until it looked pretty," as my family would say. I'm not sure I'll use Mars Bars in the future, as they tend to melt and then stick to the pan.
Cookie dough before baking:

Cookies:

All in all, a happy time baking was had by me, although by the time I was finished my temperature had risen by 2 degrees (Fahrenheit), proving that I'm not as fully recovered as I'd hoped. Oh well, it was totally worth it.
Alternative Title: "Sam finds another excuse to break her self-imposed moratorium on cookie-baking."
I've been a) very sick and b) attempting to reduce my cookie intake, hence the lack of updates recently. However, my friend is having a party tomorrow and she requested that I make cookies. That is more than enough excuse for me, so here goes...
I tried variation of my usual chocolate chip cookie recipe. I followed the basic recipe with two exceptions:
1) I use Ener-G egg replace, which calls for the addition of two tablespoons of water. I used one tablespoon of water and one of vanilla coffee creamer. Using coffee creamer this way is a great (read: cheap) way to enhance/change the flavor of cookies. Coconut creamer is especially good, for those who love coconut. (I don't, but I've used it when making cookies for those who do, and they've loved it).
2) I decided to try Dorie Greenspan's suggestion of chopping my own chocolate rather than using chips. Using a fantastic Trader Joe's dark chocolate pound plus bar that my family kindly sent when they found out I was sick, I made my own chocolate chunks.

The resulting cookie dough was tasty, and had uneven sized chocolate bits in every cookie.

The cookies themselves also turned out well:

(The trick is to take the cookies out of the oven just before they actually look done. They will finish baking on the pan and be very soft).
The advantage to chopping your own chocolate is that you generally get better quality chocolate in bars than you do in commercial chocolate chips. Of course, it helps if you a) live near a Trader Joe's store, or b) have nice family members who will mail you pound plus bars.
The second variety of cookie is one I came up with as part of an attempt to use up extra Halloween candy. My friend and I each bought a huge bag of mixed chocolates from Costco, you know... for kids. I had, however, a grand total of one trick-or-treater. In an attempt to not eat the whole bag myself, I decided to experiment with adding chopped candy to my cookies. The base cookie recipe is exactly the same as the standard one except that I used one cup of flour and 1/4 c cocoa powder instead of 1 1/4 C flour. I then added M&M's, peanut butter chips, and chopped up Mars Bars, Snickers Bars, Nestle Crunch Bars, and Snickers Fudge bars. I basically added candy "until it looked pretty," as my family would say. I'm not sure I'll use Mars Bars in the future, as they tend to melt and then stick to the pan.
Cookie dough before baking:

Cookies:

All in all, a happy time baking was had by me, although by the time I was finished my temperature had risen by 2 degrees (Fahrenheit), proving that I'm not as fully recovered as I'd hoped. Oh well, it was totally worth it.
Saturday, October 3, 2009
Peanut butter cookies: variations on a theme.
I have a weekly commitment to make cookies for a friend's Sunday school class (if that's not the sign of a wild and crazy college student I don't know what is). This week's installment is the fantastically nomable peanut butter cookies from Smitten kitchens.
However...I am constitutionally incapable of leaving a recipe as is... so I made a couple changes. First, as usual, I used Ener-G egg replacer instead of (surprise!) the egg. Also, I ran out of brown sugar, so I used roughly 1/4C brown sugar and 1 C sugar (this was actually a recipe for which I didn't feel the need to drop the sugar content!) Also, I use salted butter, as it's what I had on hand and I really like salty/sweet combinations. If you don't then use the unsalted butter called for by the original recipe, as the resulting cookies from the salted version definitely have a salty flavor to them.
Also... I had extra butterscotch sauce on hand. I didn't cook the sauce quite long enough, so it has a slightly grainer texture than it should, but it's still very tasty. Again, I used the maximum salt recommended by the sauce recipe, as I really like it that way. I did realize that I do not need to go through an entire batch of sauce myself (although I'd happily do so, my bathroom scale would complain), so I tried taking the peanut butter cookie dough, pre-chocolate and peanut butter chips, pressing an indentation into the cookie with my thumb, and adding some chilled butterscotch sauce. The result was fantastic, if I do say so myself.

I added chocolate chips and peanut butter chips to the rest of the dough as called for by the recipe. These cookies were also very good, and will be dutifully sent along to the class tomorrow.

However...I am constitutionally incapable of leaving a recipe as is... so I made a couple changes. First, as usual, I used Ener-G egg replacer instead of (surprise!) the egg. Also, I ran out of brown sugar, so I used roughly 1/4C brown sugar and 1 C sugar (this was actually a recipe for which I didn't feel the need to drop the sugar content!) Also, I use salted butter, as it's what I had on hand and I really like salty/sweet combinations. If you don't then use the unsalted butter called for by the original recipe, as the resulting cookies from the salted version definitely have a salty flavor to them.
Also... I had extra butterscotch sauce on hand. I didn't cook the sauce quite long enough, so it has a slightly grainer texture than it should, but it's still very tasty. Again, I used the maximum salt recommended by the sauce recipe, as I really like it that way. I did realize that I do not need to go through an entire batch of sauce myself (although I'd happily do so, my bathroom scale would complain), so I tried taking the peanut butter cookie dough, pre-chocolate and peanut butter chips, pressing an indentation into the cookie with my thumb, and adding some chilled butterscotch sauce. The result was fantastic, if I do say so myself.

I added chocolate chips and peanut butter chips to the rest of the dough as called for by the recipe. These cookies were also very good, and will be dutifully sent along to the class tomorrow.

What to do with mediocre supermarket tomatoes.

I've seen this trick in any number of cookbooks, and it is one of my favorites. It's hard to get decent tomatoes out here except for a month or two during the summer. What I do to compensate is to buy 2 lbs or so of tomatoes from Costco, slice them in half, then sprinkle salt, pepper and basil over the halves. I then roast them in the oven... 200F for a couple hours is best, but I don't like running the oven that long, so I often roast them at 350 or so for maybe 15 minutes, then turn off the oven and let them cook as the oven cools. Roasting the tomatoes like this concentrates their otherwise too dilute flavor. I use these for everything from salads to soups...or just eat them plain. Guiltless nom nom nom.
Note: roasting the tomatoes can make a bit of a mess on your pan. If you have Silpat (or some other equivalent silcone sheet) I recommend using it, as it makes cleanup a lot easier.
Wednesday, September 30, 2009
So much for the healthy eating resolutions...
Somehow I managed to commit to making two cheesecakes this week... one for church and one for a friend. Here's the first of the two.
Note: I've found that all cheesecakes generally work best if you make them the day before you plan to serve them, and this one is no exception.

(My apologies for the poor picture quality, this is the lone survivor of the church potluck, as people were nice enough to take home most of the extra so I wouldn't have to figure out a way to dispose of a quarter of a cheesecake all by myself).
This recipe is an adaptation of a much love recipe I found in a bargain priced cookbook at Barnes and Nobles.
Melt together on low heat:
½ C Butter
4 oz chocolate (or ½ C chocolate chips)
After chocolate is melted, add the following
1 C sugar (I reduce it to ¾ C if I’m not using bittersweet chocolate)
2 eggs, beaten
Add 1 Tbsp instant coffee to 1Tbsp boiling water, stir until dissolved, then add milk to equal ¼ cup total liquid. Add this liquid to the chocolate mixture.
Stir in until just blended:
1C flour
Add to greased and floured 9” springform pan. Cook at 350 for 20-25 minutes.
While chocolate base is cooking, mix together the following:
2 ¼ C cream cheese at room temperature (I use reduced fat. Nonfat won’t work well, though).
2/3 C sugar
Add in one at a time:
3 eggs (it works best if these are also at room temperature).
Mix until well blended, then add 1 tsp vanilla.
Take 1-2 tbsp instant coffee (I use two for a strong coffee flavor) and add to 1 tbsp boiling water as before. Then add plain yogurt (or sour cream would work, I guess) to a total volume of ½ C. Stir this mixture until fairly well blended, then add to the cream cheese mixture. Mix everything together, then pour over cooked base. I generally give the base about five minutes to cool down before adding the cream cheese mixture, but I don’t think it matters all that much.
Bake cheesecake at 350 for 45-55 minutes or until not quite set. The edges should be set but the center won’t quite be there yet. Run a knife around the edges to prevent cracking, then allow to cool to room temperature. Once it’s at room temperature stick it in the fridge (the more gradual cooling helps prevent cracking). Keep in fridge at least a couple of hours until chilled.
Topping (from Dorie Greenspan's cookbook):
In small saucepan mix the following:
1 ¼ C sour cream (I use low fat)
½ C powdered sugar.
Heat and stir until warm (but not hot) and well blended, then pour over top of chilled cheesecake. Put cheesecake back in fridge for at least another two hours to set the topping. I also grate bittersweet chocolate over the top right before serving just because I think it’s pretty.
Other Notes:
I’ve made this cheesecake without the coffee, and it works great. I’ve also made it without the topping, which is fine. I think the topping is nice when you do have coffee in the cake, though, as you get the three-color visual appeal.
Note: I've found that all cheesecakes generally work best if you make them the day before you plan to serve them, and this one is no exception.

(My apologies for the poor picture quality, this is the lone survivor of the church potluck, as people were nice enough to take home most of the extra so I wouldn't have to figure out a way to dispose of a quarter of a cheesecake all by myself).
This recipe is an adaptation of a much love recipe I found in a bargain priced cookbook at Barnes and Nobles.
Melt together on low heat:
½ C Butter
4 oz chocolate (or ½ C chocolate chips)
After chocolate is melted, add the following
1 C sugar (I reduce it to ¾ C if I’m not using bittersweet chocolate)
2 eggs, beaten
Add 1 Tbsp instant coffee to 1Tbsp boiling water, stir until dissolved, then add milk to equal ¼ cup total liquid. Add this liquid to the chocolate mixture.
Stir in until just blended:
1C flour
Add to greased and floured 9” springform pan. Cook at 350 for 20-25 minutes.
While chocolate base is cooking, mix together the following:
2 ¼ C cream cheese at room temperature (I use reduced fat. Nonfat won’t work well, though).
2/3 C sugar
Add in one at a time:
3 eggs (it works best if these are also at room temperature).
Mix until well blended, then add 1 tsp vanilla.
Take 1-2 tbsp instant coffee (I use two for a strong coffee flavor) and add to 1 tbsp boiling water as before. Then add plain yogurt (or sour cream would work, I guess) to a total volume of ½ C. Stir this mixture until fairly well blended, then add to the cream cheese mixture. Mix everything together, then pour over cooked base. I generally give the base about five minutes to cool down before adding the cream cheese mixture, but I don’t think it matters all that much.
Bake cheesecake at 350 for 45-55 minutes or until not quite set. The edges should be set but the center won’t quite be there yet. Run a knife around the edges to prevent cracking, then allow to cool to room temperature. Once it’s at room temperature stick it in the fridge (the more gradual cooling helps prevent cracking). Keep in fridge at least a couple of hours until chilled.
Topping (from Dorie Greenspan's cookbook):
In small saucepan mix the following:
1 ¼ C sour cream (I use low fat)
½ C powdered sugar.
Heat and stir until warm (but not hot) and well blended, then pour over top of chilled cheesecake. Put cheesecake back in fridge for at least another two hours to set the topping. I also grate bittersweet chocolate over the top right before serving just because I think it’s pretty.
Other Notes:
I’ve made this cheesecake without the coffee, and it works great. I’ve also made it without the topping, which is fine. I think the topping is nice when you do have coffee in the cake, though, as you get the three-color visual appeal.
Sunday, September 20, 2009
Weekend bakination...
They say the first step to solving a problem is admitting you have a problem... Between baking for socialness on Saturday and baking some cookies for a friend's Sunday school class I ended up logging some serious cooking time this weekend.
These are the pumpkin muffins I described earlier, as well as some cheese muffins from a recipe I adapted from a Cooking Light recipe (I'll post it if anyone is interested).

I also baked the rest of the chocolate cookies, and made the amazing espresso shortbread cookies, which I believe originally came from a Dorie Greenspan recipe (it's only a matter of time before I break down and buy her fabulous cookbook) [Edit: I found one for 1/2 price on Amazon. I broke down and bought it. That didn't take long]. I've made these shortbread cookies twice. I don't keep expresso powder on hand, so I used instant coffee instead. One time I used 2 tablespoons and the other time I only used 1; go with the higher amount. I also tried it with dark chocolate and with toffee/chocolate. I didn't think it made a huge difference one way or the other; the toffee flavor doesn't really come out.

(shortbread)

(shortbread and chocolate cookies)
And lastly I made my usual chocolate chip cookies for the Sunday school class. This is a recipe I've adapted from a Mrs. Fields cookbook.
Cream together:
1/2 C butter (Earth Balance works fine for this recipe; I have a relative who is allergic to milk so I've tried it quite successfully).
1/2 C brown sugar
(optional: add 1/4 C white sugar in addition to brown sugar. I don't because I don't like super-sweet cookies, but I do find some people prefer it).
1 tsp vanilla
1 egg/ener-G equivalent (I use the equivalent because then you can eat the cookie dough without having to worry about salmonella. Also it's cheaper).
Add in:
1/2 tsp baking soda
1/4 tsp salt
1.25 C flour
Mix until blended, then throw in a few handfuls of chocolate chips (the more the better; I probably use about a cup).
Eat cookie dough.
Bake remaining dough at 325 for 10-15 minutes (my oven runs pretty hot, so it doesn't take long). I like to take them out when they look just barely underdone and leave them on the cookie sheet to cool. This allows them to bake that last little bit while staying soft).

These are the pumpkin muffins I described earlier, as well as some cheese muffins from a recipe I adapted from a Cooking Light recipe (I'll post it if anyone is interested).

I also baked the rest of the chocolate cookies, and made the amazing espresso shortbread cookies, which I believe originally came from a Dorie Greenspan recipe (it's only a matter of time before I break down and buy her fabulous cookbook) [Edit: I found one for 1/2 price on Amazon. I broke down and bought it. That didn't take long]. I've made these shortbread cookies twice. I don't keep expresso powder on hand, so I used instant coffee instead. One time I used 2 tablespoons and the other time I only used 1; go with the higher amount. I also tried it with dark chocolate and with toffee/chocolate. I didn't think it made a huge difference one way or the other; the toffee flavor doesn't really come out.

(shortbread)

(shortbread and chocolate cookies)
And lastly I made my usual chocolate chip cookies for the Sunday school class. This is a recipe I've adapted from a Mrs. Fields cookbook.
Cream together:
1/2 C butter (Earth Balance works fine for this recipe; I have a relative who is allergic to milk so I've tried it quite successfully).
1/2 C brown sugar
(optional: add 1/4 C white sugar in addition to brown sugar. I don't because I don't like super-sweet cookies, but I do find some people prefer it).
1 tsp vanilla
1 egg/ener-G equivalent (I use the equivalent because then you can eat the cookie dough without having to worry about salmonella. Also it's cheaper).
Add in:
1/2 tsp baking soda
1/4 tsp salt
1.25 C flour
Mix until blended, then throw in a few handfuls of chocolate chips (the more the better; I probably use about a cup).
Eat cookie dough.
Bake remaining dough at 325 for 10-15 minutes (my oven runs pretty hot, so it doesn't take long). I like to take them out when they look just barely underdone and leave them on the cookie sheet to cool. This allows them to bake that last little bit while staying soft).

Thursday, September 17, 2009
Why Sam needs to bike this weekend: exhibit A
Background for why I'm baking during the week: During the summer I am able to go to Tae Kwon Do classes on Thursdays. Unfortunately, once the school year begins the Thursday TKD class is switched back to what I like to think of as "Crazy People TKD" class, wherein competitors try to kill each other and themselves. I don't attend this class. Luckily for me, though, I've managed to arrange general socialness this weekend (read: Sam offloads baked goods on unsuspecting friends).
I decided to try this recipe, as I respect any recipe that has a LOT more chocolate than all the other ingredients put together.
Mostly I followed the directions as listed. I did make a few changes, though. The most basic change stems from the fact that I am a poor grad student, and poor grad students (even psycho baking ones) don't have tons of high-grade chocolate on hand. I therefore replaced the unsweetened chocolate with a couple squares from an 85% lindt chocolate bar I picked up on sale not long since, and replaced the six ounces of bittersweet chocolate with 3/4 cup (which is roughly equivalent volume/weight) semi-sweet chocolate chips. (Costco sells 10 pounds of semi-sweet chocolate chips for $17.99. I love Costco). In order to compensate for these changes I dropped the sugar from 2/3 C to 1/2C.
The second change came about because I always freeze my raisins because I buy them in bulk from the local co-op; bulk foods are notorious havens for nasty little bugs, so I like to be careful. Unfortunately, this can lead to interesting baking if (like me) you don't have a microwave to thaw things out quickly. Also, I was suspicious about how good raisins would be in chocolate cookies. My solution was to take about a cup of raisins (I didn't bother to measure) and cook them in a splash of rum. This had the advantage of tastyifying the raisins while simultaneously thawing them out.

In order to not throw off the liquid/dry ingredient balance I made sure the rum was all cooked away before adding the raisins to the cookie dough.
Next I melted the chocolate chips/lindt bar squares with butter as directed. I've found it's a good idea to turn off the burner (if you have an electric stove like mine) halfway through; it will retain enough heat to gradually melt the chocolate. Do not turn your back on this step; chocolate melts and burns quickly! This is what it should look like right before it's done; at this point you can see small bits of butter remaining, but it's basically smooth. I recommend removing the pan from the burner entirely at this stage; the chocolate is warm enough to finish melting all on its own.

I am a huge fan of my stand-alone mixer. That being said, I did (and would strongly recommend that others do as well) follow Ms. Greenspan's directions about mixing in the last ingredients by hand. I chose to use 3/4 cup each semi-sweet chocolate chips and white chocolate chips, and about 3/4 cup pecans. There are, at this point, way more add-ins than dough.

Luckily for me, someone gave me a silicon sheet several years ago. I placed this on a cookie sheet and very carefully scooped cookie dough onto it. The dough at this point is almost more like brownie batter than normal cookie dough, so you must use a spoon to drop it.

I tried (in the spirit of scientific experimentation) using pan spray in addition to the silicon sheet, and using only the silicon sheet. The verdict was clear: don't use pan spray. The cookie with pan spray spread out and burned on the edges; the other one did not. Here's a picture of the finished product:

I only cooked the two trial run cookies; my get-together isn't until later in the week. I'll try to update with a better picture once I've baked some more cookies. All in all I'm extremely pleased with this recipe and will make it again. I'm just hoping that a rich, distant and unknown relative will die and leave me a chocolate factory so that I will be able to make them frequently without having to worry about replenishing my baking chocolate supply.
I decided to try this recipe, as I respect any recipe that has a LOT more chocolate than all the other ingredients put together.
Mostly I followed the directions as listed. I did make a few changes, though. The most basic change stems from the fact that I am a poor grad student, and poor grad students (even psycho baking ones) don't have tons of high-grade chocolate on hand. I therefore replaced the unsweetened chocolate with a couple squares from an 85% lindt chocolate bar I picked up on sale not long since, and replaced the six ounces of bittersweet chocolate with 3/4 cup (which is roughly equivalent volume/weight) semi-sweet chocolate chips. (Costco sells 10 pounds of semi-sweet chocolate chips for $17.99. I love Costco). In order to compensate for these changes I dropped the sugar from 2/3 C to 1/2C.
The second change came about because I always freeze my raisins because I buy them in bulk from the local co-op; bulk foods are notorious havens for nasty little bugs, so I like to be careful. Unfortunately, this can lead to interesting baking if (like me) you don't have a microwave to thaw things out quickly. Also, I was suspicious about how good raisins would be in chocolate cookies. My solution was to take about a cup of raisins (I didn't bother to measure) and cook them in a splash of rum. This had the advantage of tastyifying the raisins while simultaneously thawing them out.

In order to not throw off the liquid/dry ingredient balance I made sure the rum was all cooked away before adding the raisins to the cookie dough.
Next I melted the chocolate chips/lindt bar squares with butter as directed. I've found it's a good idea to turn off the burner (if you have an electric stove like mine) halfway through; it will retain enough heat to gradually melt the chocolate. Do not turn your back on this step; chocolate melts and burns quickly! This is what it should look like right before it's done; at this point you can see small bits of butter remaining, but it's basically smooth. I recommend removing the pan from the burner entirely at this stage; the chocolate is warm enough to finish melting all on its own.

I am a huge fan of my stand-alone mixer. That being said, I did (and would strongly recommend that others do as well) follow Ms. Greenspan's directions about mixing in the last ingredients by hand. I chose to use 3/4 cup each semi-sweet chocolate chips and white chocolate chips, and about 3/4 cup pecans. There are, at this point, way more add-ins than dough.

Luckily for me, someone gave me a silicon sheet several years ago. I placed this on a cookie sheet and very carefully scooped cookie dough onto it. The dough at this point is almost more like brownie batter than normal cookie dough, so you must use a spoon to drop it.

I tried (in the spirit of scientific experimentation) using pan spray in addition to the silicon sheet, and using only the silicon sheet. The verdict was clear: don't use pan spray. The cookie with pan spray spread out and burned on the edges; the other one did not. Here's a picture of the finished product:

I only cooked the two trial run cookies; my get-together isn't until later in the week. I'll try to update with a better picture once I've baked some more cookies. All in all I'm extremely pleased with this recipe and will make it again. I'm just hoping that a rich, distant and unknown relative will die and leave me a chocolate factory so that I will be able to make them frequently without having to worry about replenishing my baking chocolate supply.
Sunday, September 13, 2009
Weekend cooking...

As a note of explanation, I do most of my cooking on the weekend because my weeks are way too crazy to have time to cook proper meals. Anyway, I decided to try this recipe. I managed, through extremely good luck, to pick up a bottle of truffle oil at TJ Maxx, of all places, for a reasonable price. I actually sprayed canola oil on the onions/potatoes, rather than adding olive oil, as the truffle oil added later on is responsible for the flavor, not the olive oil. Otherwise I more or less tried to follow the recipe.
I was quite happy with how it turned out, and the recipe fit well in my cast-iron pan. It takes a long time to cook, but I've been baking other things, so I just had it sitting in the oven as I did the rest of my cooking. (This meant I used a lower temperature, though, which is undoubtedly why it took so long to cook).
One of the aforementioned "other cooking" recipes I was making was the soft chocolate chip cookie recipe from the King Arthur's Flour baking book. I made these, I hasten to add, not for my own consumption (I'm on a healthy eating kick right now), but for a friend who had a really rotten week last week (cue "I hate men" song here). I have to say that I wasn't super-happy with this recipe; it's simply way too sweet for my taste. Normally I cut at least 25% of the sugar from any cookie recipe, but I decided not to do so this time. In the future, if I make these again, I will definitely decrease the sugar.

Apple sauce!

Since I'm a Californian, the idea of "seasons" is still somewhat a novelty for me. That being said, I've found I really enjoy living here in New England, where each season is celebrated in its own way. For me, making apple sauce is a way to celebrate fall (my favorite season, as it's still warm enough to bike but not so sunny as to cause spontaneous combustion in those of us who inherited a skin tone known scientifically as "day-glow white."). This tradition started my first autumn in Vermont, when I made my way to a very remote pick-your-own apple orchard and spent an enjoyable, albeit soaking wet, afternoon picking apples. I then had to figure out what to do with them, as I dislike raw apples.
My apple sauce recipe is pretty basic. I should also stress that this is not a recipe suitable for canning, as I have not included lemon juice or any other acidic ingredient to inhibit the growth of Clostridium botulinum, the organism responsible for botulism poisoning. This is, rather, how I make myself a pot of applesauce to eat throughout the week.
Recipe (such as it is):
Buy one of those nifty apple-peeler-corer-slicer thingies. Really, it's worth it, and they're not very expensive.
Peal/core/slice about three pounds of apples. This translates to 1/2 a peck, roughly, I believe, although I've never known what a "peck" is. Unit of volume? Weight? I haven't a clue.
Throw apple slices in a pot. Add enough water to completely cover the bottom of the pot (this prevents burning. I found out the importance of this step the hard way last year. I had to throw out probably five pounds of apples because I scorched the bottom of the pot).
Add roughly:
Juice from one orange.
1/4 cup dark brown sugar
1 tsp cinnamon
1/4-1/2 tsp cloves (I used more because my cloves are old, so they've lost quite a lot of their original punch).

Simmer apples on low to medium heat, stirring when you remember to do so, and (this is important) adding water as needed to keep the bottom of the pot covered in liquid. You could use apple cider to do this; I simply didn't have any on hand. It also occurred to me that number of herbal teas would probably be excellent in place of water as well. The time needed for cooking depends on how high your stove is turned up, and how broken down you want your apple sauce to be. I'd estimate I had it going for about 45 minutes just because I had other things going on. You can also use an immersion blender to achieve a smoother texture sauce. I didn't because I like my apple sauce to still have little recognizeable bits of apples.

At the end I threw in a dash of (Vermont, bien sûr) maple syrup because I felt the apples were a little tart. If you choose do this please, for the love of all that is holy, do NOT use that awful maple-flavored corn syrup "imitation maple syrup" crap. Use the real stuff or just skip it.
I eat this with plain yogurt mixed in. So...tasty... and healthy, actually.
Subscribe to:
Posts (Atom)


